To start versioning a new project or solution, or an existing one, add it to a Subversion repository.
Important: You must first create a Subversion repository from outside the Visual Studio environment. You can do this using a Subversion client such as TortoiseSVN, or the command "svnadmin create <repository_path>" at the Subversion command line.
- Right-click your solution and select Add Solution to Subversion.
To add specific projects rather than the containing solution, you can select Add Selected Projects to Subversion instead.
The Add to Subversion dialog appears. The project's name and location of your working copy are filled in.

- Supply these details:
- Specify the URL to your Subversion repository. Select a URL from the dropdown or enter one. For example, https://demo.collab.net/svn/repos.
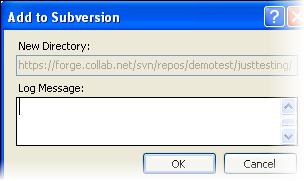
- To add the solution to a new subdirectory, select the Create Folder option, and enter a directory name and log message.
- If you intend to create branches to the main line of development, you will probably want to create a trunk folder to store the main line. To do this, check the Add trunk folder for Project option.
- Click OK.